Creating your First DB on SQLite Manager

Hello guys in the previous tutorial I have shown you how to install Netbeans IDE and the SQLite Manager on your HDD properly. So in this tutorial we are going to show you how to create your first SQLite DB on SQLite Manager.

Now you know we have installed the SQLite Manager as a firefox browser add-on. So to open the SQLite Manger you need to go to the firefox web browser and then select SQLite Manager add-on from there.

2017-04-07 (2)
SQLite Manager home screen.

Now you need to create your first database on SQLite Manager. Ok here is the process then.

Setting up my first SQLite data base

Click on the “Database” item at top menu bar. Once you click on that, you will be seen several options including “New Database” option. Right then, click on that “New Database ” option.

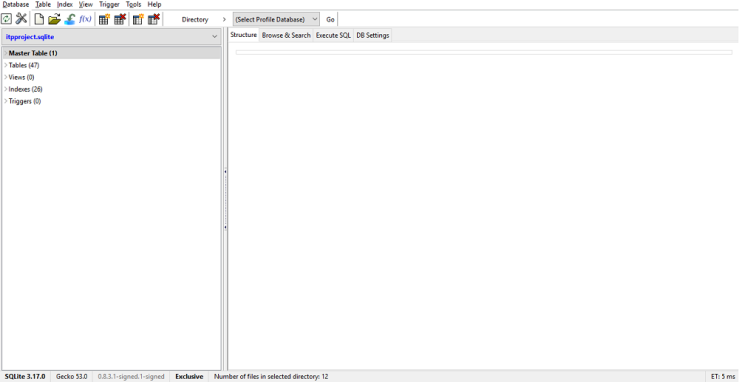
Now I need to give a proper name to my data base. And I’m going to name my db as “STproject”

NOTE: your SQLite DB file will be saved as in .sqlite format not in .sql format. EX:STproject.sqlite

And once you click OK , you will be asked to choose the folder to save the DB file. So create or select your desired folder and click Select Folder.

Installing Netbeans and SQLite

Hello guys, very first thing you need to do before start your first java project, is  installing netbeans IDE and the SQLite database server on your machine.  If you guys have not installed those two yet, then follow these steps to setup them properly on your HDD.

Installing Netbeans IDE

To install the netbeans IDE first you need to visit netbeans official website, which is https://netbeans.org/ and to download the latest version netbeans 8.2 you need to visit their download page which is https://netbeans.org/downloads/ . So simply download the binary file and follow the installation process to install it on your HDD.

Installing SQLite

If you guys have no idea about SQLite then do not worry about that as this also same as the MySQL server and there are tons of articles on SQLite in the internet. So here I’m only going to show you guys how to install SQLite on your HDD.

step1: Open Firefox web browser

step2: Click Add-ons

step3: Search “sqlite”

2017-04-07

step4: So download and enable the plugin, and that is that.

Once you install and enable the plugin, you can see the SQLite Manager in your plugin list.

2017-04-07 (1)


So I hope now you have successfully installed the SQLite Manager and the Netbeans IDE without having any issue on your HDD and if you guys have faced any kind of issue during the installation process please put a comment down there.

And the next post will be about creating a new project on netbeans and database on SQLite Manager. Till then tataa!